Showing posts with label gluten free. Show all posts

Thursday, 13 February 2014

Gazpacho


When you have an abundance of beautiful heirloom tomatoes, cucumber and purple capsicums in your garden and it is a hot Aussie Valentines day evening, what does one do? Well if you are me, then you make gazpacho - yummy, healthy, refreshing, super easy and quick to make with the perfect hues of pink to start your valentines evening.

This recipe is gluten free and does not have any bread and still has a lot of body and volume, however, you may choose to add some stale bread soaked in water if you prefer or alternatively add some almond meal.


You will need:

5-7 medium sized ripe tomatoes
1 lebanese cucumber or 1/2 a continental cucumber
1 small capsicum
Salt to taste
2 tablespoons of extra virgin olive oil
Freshly ground pepper or a few drops of tabasco sauce (optional)
Fresh mint leaves for garnish

Method:

Roughly chop the tomatoes, peeled cucumber and capsicum and add to a blender. You can also use a hand blender. Blend until all the chunks disappear, season with salt and pepper and add the olive oil. Briefly blend again and pour into glasses. Chill for 20 minutes and garnish with mint leaves and a drizzle of olive oil. You can also add ice cubes and serve it immediately.

Enjoy and happy valentines day!

Tuesday, 11 February 2014

Pav Bhaji


Pav Bhaji is another Indian fast food favourite.  The origins of the dish are from Bombay and hence it is sometimes also called Bombay Pav Bhaji, but its popularity has spread to other parts of India, especially Calcutta, where Pav Bhaji vendors do brisk business. The bhaji, which is essentially a spicy blend of many vegetables is pre made and is kept hot. The pav is similar to a dinner roll/ burger bun but is made out of milk and is slathered with butter and toasted on order. Served together you have Pav Bhaji, a finger licking, match made in heaven.

To make the bhaji, you can choose a combination of different vegetables of your choice. I use the following:

Ingredients for Bhaji (serves 4-6)

3 red onions
1 large green capsicum
1/4 cauliflower
3 large ripe tomatoes
4 medium sized potatoes boiled
1 cup of frozen peas
5 cloves of garlic
1 green chilli
1 cup of water
Salt and chilli powder to taste
1/4 teaspoon of turmeric powder
2 heaped teaspoons of  shop bought Pav Bhaji masala
Juice of 1 large lemon
Butter or oil to cook

Method

Add two tablespoons of butter or oil (for a vegan version) in a large wok or skillet and add finely chopped garlic, green chilli and onions, saute on a low flame until the onions are tanslucent. Next add the chopped green capsicum and cook for 2-5 minutes followed by the finely chopped cauliflower, continue to cook for about 10 minutes stirring regularly. Add the chopped tomatoes and mix well and add the salt, red chilli powder, turmeric and Pav Bhaji masala (which can be bought in most Indian grocery stores). Add 1 cup of water and continue cooking for a further 10 minutes and then add the frozen peas and mashed boiled potatoes. The boiled potatoes help thicken the Bhaji, and if the consistency is too thick you can add 1/4 cup of extra water, but remember this is not a curry but a thick vegetable mix, similar in consistency to a slurry. Cook for another 5-10 minutes to ensure all the ingredients are well cooked and assimilated. Add the lemon juice and taste to ensure the seasoning is to your liking. Adjust as needed and garnish with a wedge of lemon and a small knob of butter.

The Bhaji is traditionally served with butter and toasted Pav bread, but you can serve it with dinner rolls, burger buns, gluten free rolls or even toasted sliced bread.

Enjoy!


Monday, 27 January 2014

Jhal moori - puffed rice salad


Speak to anyone who has lived or travelled to West Bengal in India and they have most definitely come across the cries of 'jhal moorie, jhal moorie' on railway stations and local trains.  Moorie, as it is also called around the city of Calcutta is so called after the main ingredient puffed rice which is called moorie in Bengali and the work jhal simply means spicy hot. It is a favourite street food and is sold at pretty much every street corner.

In fact, it is so popular that we had a 'moorie man' selling his delicious produce inside our very strict convent school compound. He would do brisk business everyday selling moorie to students and teachers alike from his little kiosk which he would set up on a wicker stand. At the end of the school day, he would just pack and carry his little stand and kiosk and set up shop somewhere else.

Having grown up eating this road side staple, I often make it at home, especially on hot days, when I do not feel like cooking. In all honesty, it is really simple to make, in fact it is nothing more than an assembly job and as with most street food in India, it is customised to ones preferences. Though, there is a list of ingredients which are usually added, you can omit some or add more or less of something depending on your taste buds.

You will need


Moorie (puffed rice)
Chopped cucumber
Chopped tomato
Chopped red onion
Chopped boiled potato
Handful of roasted peanuts
Chopped fresh coconut (can be omitted if unavailable or dried coconut flakes can be added instead)
Chopped coriander
Bhujiya (gluten free gram flour noodles)
Chana chur (gluten free mixture also called bhuja mix)
Chat masala
Ground cumin powder
Salt
Chilli powder
Black/ pink mineral salt (if available)
Lime or lemon juice (tamarind water can also be used)
Mustard oil
Green chilli (optional)

I have not mentioned the quantities as it will depend on how much you would like to make. Since my husband and I love it, I often make a large bowl and have it as a meal instead of dinner. I use 1 onion, tomato, cucumber and boiled potato each and finely chop them into a large bowl. Next, I add small handfuls of the chopped coconut, peanuts, bhujiya and chanachur, followed by the desired amount of spices. Next, I add 1 teaspoon of mustard oil and the juice of 1 lime/ lemon and the chopped coriander and green chillies, if using and mix well. I save the puffed rice for the very end as it goes soggy very quickly and the moorie must be served as soon as the puffed rice goes in and has been mixed well. The ratio of puffed rice I use is approximately equal to the amount of chopped onion, tomato, cucumber and boiled potato used. Though this can also be adjusted to your liking. Mix well, serve in large bowls, garnish with some coriander sprigs and bhujiya and enjoy immediately as it cannot be stored.

The moorie, and gluten free bhujiya and chanachur can be bought from any Indian grocery store.


Monday, 23 December 2013

Flour less fruit and nut cake


This time last year, I was on a strict elimination diet which meant I could not eat gluten, dairy, eggs, soy, nuts etc. However, even though I am back to a normal diet now, a few habits I developed during the elimination diet have stayed with me and I often make gluten free cakes. Plus, I also wanted to create a festive recipe that people with food intolerances could also enjoy. The result is my flour less fruit and nut cake. It is #gluten free and #dairy free, uses minimal sugar and can easily be converted into a #vegan version. And as far as fruit and nut cakes go, this one is pretty extravagant, which is fitting for this time of the year.

Ingredients:

Fruit mix
1 cup of mixed dried fruit (I used sultans, currants, cranberries, figs, prunes and dates)
Zest and juice of 1 orange
1 heaped teaspoon of ground ginger
1 heaped teaspoon of ground cinnamon
1/4 cup of cognac (brandy, sherry or rum can also be used, alternatively replace with orange juice for an alcohol free version)

Nut mix
1 cup of  chopped nuts (I used almonds, macadamias, hazelnuts, walnuts, pecans and pistachios)

Cake batter
1 cup of almond meal
2 eggs (or two heaped teaspoons of egg replacer powder mixed in water for a vegan version)
Zest and juice of 1 orange
1/4 cup of soft brown sugar
2 tablespoons of rice bran oil (or any other light cooking oil)
1 teaspoon of baking powder

Glaze and topping
3 heaped tablespoons of apricot jam
1 tablespoon of water
Handful of nuts and cranberries to decorate

Method

I prefer to make the fruit mixture in advance so that the spices and alcohol can infuse into the fruit. Simply place all the ingredients (dried, fruit, spices, cognac, zest and juice) together in a mixing bowl and mix well to combine. Cover with cling wrap and set aside for at least 20 minutes or overnight of time permits.

To make the cake batter combine the almond meal, brown sugar and baking powder and mix well with a spatula to ensure there are no lumps. Add the chopped nuts and mix. In a separate mixing bowl, lightly beat two eggs, add the oil and juice and zest of an orange followed by the dry fruit mixture. Add the wet ingredients to the dry and mix to combine. Pour the cake batter into a lined loaf or small cake tin. Bake in a 180 C fan forced oven for 55-60 minutes.

Remove from in the oven, cool in the tin for 15 minutes and then remove from tin and cool on a wire rack.

To make the glaze, place the apricot jam and water in a small saucepan and heat over a low flame for 2-3 minutes or until tiny bubbles appear around the edges. Brush on the warm glaze on to the cool cake. Decorate with nuts and dried fruit of your choice and place some of the remaining glaze on to the nuts and fruit to give them a beautiful sheen.

The cake is delicious on its own, but any left over cake can be served with custard or ice cream.

I hope you enjoy this moist and rich cake with your family and friends or give it as a beautiful edible christmas present. You do not have to be on a gluten free diet to enjoy this lovely cake, but if by any chance you have someone with a food intolerance in your circle of family and friends, they will feel completely spoilt when you make this for them.


Monday, 16 December 2013

Mince pie - Gluten free and vegan


This pie is #gluten free, #dairy free, # nut free, # vegetarian, #vegan.

The pastry is made with amaranth flour, which is gluten free and a healthier substitute to flour and results in a crispy yet chewy pastry. To make one large pie or 12 small ones you will need:

1 cup of amaranth flour
1/4 cup of pure icing sugar (sifted)
1/4 cup of rice bran oil
2 tablespoons of cold water


I make a large batch of the fruit mince mixture and use it for regular as well as gluten free pies. The fruit mix quantity mentioned catered for 1 dozen small, 1 dozen medium and 1 large pie.  Depending on the number of pies you make, you may have some extra mixture left over, which can be refrigerated for use later.

Fruit mix

1 cup of chopped sultanas
1 cup of currants
1/2 cup of chopped cranberries
Zest and juice of 1 orange
2 tablespoons of brandy
1 heaped teaspoon of ground cinnamon
1 heaped teaspoon of ground ginger
1/4 cup of maple syrup or honey

For the dry fruit mixture, mix all the ingredients together and allow to stand for a minimum of 20 minutes or overnight if time permits.

Make the pastry by mixing the flour, sugar and oil. Use the cold water to bring the dough together. Because there is no gluten the dough does not need to be worked, you just need to ensure the ingredients are mixed through and come together. Wrap in cling wrap and chill for 20 minutes. Roll out the pastry between two sheets of grease proof paper. The pastry is very fragile, so it is easier to make smaller pies, alternatively, do what I do and place the pastry in the pie tin and spread it with your fingers, just like you would for the base of a cheese cake, taking care that the sides are pushed all the way up to give the pie crispy edges.  Reserve some pastry for the pie tops. The pastry scraps can be brought together and rolled out. This pastry does not need to be blind baked as the sugar and oil ensure you get a crispy pastry, so you can add the fruit mince mixture, place the pastry tops and bake in a 180 C oven for 30-40 minutes. I have opted to put little star cutouts, but you can add strips of pastry to make a lattice, add slivered almonds or leave it open just as with a tart, though take care not to burn the fruit.

Dust with icing sugar and enjoy warm or cold.


Monday, 9 December 2013

Palak wali dal - lentils with spinach


Given that I have an absolute abundance of spinach in my garden right now, I have been using it in absolutely everything from quiches, pies, curries, soups, sauteed with eggs and now with dal. I remember my mum used to make something similar and I have tried to recreate the dish from memory. I have used split Urad dal but I am sure other lentils will also work. You can eat it Indian style with flat bread or rice or enjoy it like a thick, chunky soup with some crusty bread.

Ingredients:

2 Cups of Urad dal (rinsed and soaked for at least 20 minutes)
4 cloves of garlic
1 inch piece of ginger
1 large onion chopped finely
1 tomato finely chopped
1 large bunch of spinach -  washed and roughly chopped
Salt and chilli powder to taste
1/4 teaspoon of turmeric powder
1/2 teaspoon of Garam masala powder
2 tablespoons of cooking oil (I use rice bran oil)
Coriander springs for garnish

Method:

I precook the dal and cook the spinach with tarka  (tempering) to avoid overcooking the spinach. I pressure cook the dal but you can also cook it in a saucepan until tender.

Cook the washed and soaked dal in about six cups of water with the chopped onion, garlic and turmeric powder until tender.  A pressure cooker will speed up the cooking time. Allow the pressure cooker to come to pressure on high flame, then turn down the gas and allow it to come to pressure two more times. Turn off the gas, set aside and allow the pressure to dissipate on its own.

Fot the tarka, heat up a skillet and add the the cooking oil. Add the chopped onions and fry on a medium heat until the onions are golden brown in colour. Add the chopped tomato and cook for a further 5 minutes. Add the salt and chilli powder followed by the chopped spinach. Cook on a low heat until the spinach wilts and is tender. Add the garam masala powder and add the tarka (the spinach, onion tomato mixture) to the cooked dal or add the cooked dal to the tarka (depending on the size of your utensils, the idea is to combine the two). Bring the dal to a boil (adding more water if required to achieve the desired consistency), add the chopped coriander. Serve hot and enjoy.


Monday, 2 December 2013

Chicken and potato curry


This dish is inspired by meat curries made in Bengal, where potatoes are often added to chicken or mutton curries. The potatoes not only bulk up the meal, which makes it go further but also absorb all the flavours while cooking and as a result taste delicious. I have also cooked this dish in mustard oil, which is also commonly used in Bengal and it provides another dimension to the dish, but vegetable or olive oil can also be used if preferred.

I have used boneless thigh fillets, but a whole chicken or skinless drumsticks can also be used, though the cooking time will vary.

Ingredients
500 gms chicken thigh fillets, cubed
6 medium sized potatoes cut in 8 pieces
2 large onions minced
1 tomato pureed
1 inch piece of ginger minced
6 cloves of garlic minced
Salt and chilli powder to taste
1/2 teaspoon of turmeric powder
2 dried red chillies
1/4 teaspoon fenugreek seeds
1 teaspoon curry powder
1/4 cup chopped corriander
2 tablespoons of mustard oil
1 cup water

In a large wok or skillet, heat the mustard oil and add the dried chillies and fenugreek seeds. Wait about 30 seconds before adding the minced onion, ginger and garlic ( I mince them together in a food processor, and in the past would have added at least 2 green chillies as well but since I am cooking toddler friendly meals, I have cut down on the chilli quotient). Brown the onion mixture ( get this step right and all your curries will taste delicious, so take the time, stir frequently and allow the onions to caramelise) before adding the pureed tomato. Add the salt, chilli powder and turmeric and mix well. Then add the cubed chicken pieces and stir to ensure the chicken pieces are well coated. Next add the cubed potatoes and mix well. Add the curry powder mixed in one cup of water. Bring the curry to a boil, then cover and simmer for 20 minutes,  giving it a stir now and then to ensure the bottom does not catch. You may add extra water to achieve the preferred consistency. Add the chopped corriander and serve warm with plain rice or chappati and a simple salad.

Enjoy!


Monday, 30 September 2013

Easy chicken curry


This recipe is my stock standard chicken curry recipe. It is quick and easy to make, has no cream, nuts or dairy and is both healthy and yummy. A favourite for the entire family.

You will need:

500 gm free range chicken thigh fillet (chopped into medium sized cubes)
2 onions
6 cloves of garlic
2 cm piece of ginger
2 tablespoons of tomato paste
Salt to taste
1/2 teaspoon of red chilli powder (or to taste)
1/2 teaspoon of garam masala or shop bought chicken curry masala
1/4 teaspoon of turmeric powder
1 tablespoon of kasoorie methi (dried fenugreek leaves)
2 tablespoons of oil
1 bay leaf
2 cm piece of cinnamon bark
2 cloves
1 black cardamon

Method

Peel the onion, garlic and ginger and puree them in a food processor (these days I am cooking my meals toddler friendly, so there are no green chillies here but you can add 1-2 green chillies as they add to flavour and of course some heat as well) . In a wok or heavy based skillet, add the oil and the whole spices and cook for 30-40 seconds before adding the onion mixture. Cook, stirring regularly until the mixture has reduced and browned. Add the tomato paste, followed by the dried fenugreek leaves and all the powdered spices. Cook for 2 minutes and then add the chicken pieces. Ensure all the chicken is coated with the onion tomato mixture and stir often to ensure all the chicken pieces are sealed. Now add some plain water (depending on the consistency you are after and whether you are serving the curry with bread or rice) keeping in mind that the chicken will also release some water during the cooking process. I always add less, and then add more later if needed, much easier than fixing a thin, watery curry (though there are a few tricks to do that as well, I will post them some other time). Bring the curry to a boil, reduce the heat, cover and simmer for 15-20 minutes or until the chicken is tender.

Garnish with boiled eggs or fresh coriander springs. Serve hot with rice or flat bread, and if you have any left over, you are in luck as this curry tastes even better the following day.


Friday, 10 May 2013

Sugar free fruit and nut loaf


I created this recipe as I wanted a new breakfast option as I was getting tired of eating cornflakes everyday and a quick breakfast is the hardest meal on my no gluten, soy, egg or dairy elimination diet. This loaf is perfect as it is packed full of goodness, a thick slice keeps me going all morning and I can vary it up by using different jams, honey, peanut or nut butters or even vegan margarine.  It is also great as a tea cake served with your favourite tea or coffee. Besides being vegan and gluten free, there is no added sugar (the sweetness comes from the dried fruit), which is great for people who are watching their cane sugar intake.

You will need the following:
1 cup of almond meal
1 cup chick pea flour
1/2 cup of slivered almonds (or chopped nuts or seeds of your choice)
1 cup of raisins and sultanas (you can also use currants or other dried fruits like apricots or pear chopped up)
1 cup of almond milk
2 tablespoons of olive oil
1 heaped teaspoon of baking powder
1 teaspoon of baking soda
2 heaped teaspoons of egg replacer powder
Handful of flaked almonds or sesame seeds to sprinkle on top

Method:

In a large mixing bowl, place the chick pea flour and almond meal, breaking up any lumps. Add the baking powder, baking soda and egg replacer powder and mix with a spatula to combine. Add the fruit and nuts and mix again. Make a well in the middle of the dry ingredients and add the oil and almond milk. Mix until just combined and transfer to a lined loaf tin. Sprinkle some almonds or sesame seeds on top and place in a 175C preheated, fan forced oven for 40-45 minutes, or until a skewer inserted in the middle comes out clean.

Cool on a wire rack and cut into thick slices. Will keep well in an airtight container for 3-4 days. It is yummy at room temperature or you can place under a hot grill for a few minutes and spread with some vegan margarine before serving.


Saturday, 27 April 2013

Raspberry surprise chocolate cupcakes


These scrumptious cupcakes are both gluten free and vegan. To make a batch of 12 you will need the following:

1 cup almond meal
1 cup chick pea flour (besan)
1 cup soft brown sugar
1/4 of pure cacao powder
1/4 cup of oil
3/4 cup almond milk
1.5 teaspoons of baking powder
1/2 teaspoon baking soda
Pinch of salt
2 heaped teaspoons of egg replacer powder
1 teaspoon of vanilla extract


Raspberry compote*
1 cup of fresh or frozen raspberries
2 tablespoons of soft brown sugar
 * alternatively you can use a good quality shop bought raspberry conserve or jam

Chocolate icing
1 avocado
1 teaspoon of cacao powder
1.5 teaspoon of icing sugar


I always start with making the raspberry compote as I like it to be cool when I add it to the cup cake mixture. Place the raspberries in a saucepan and turn on the heat, cook the raspberries until they have softened and the juices have released and started to evaporate. Add the sugar; I like the mixture to be a little tart as it contrasts well with the chocolate cake, but if you prefer you can increase the quantity of sugar added. Cook until the mixture is glossy and has a jam like consistency. Set aside to cool.

Pre heat a fan forced oven to 180C and line a cupcake tin with paper cases. In a large mixing bowl add all the dry ingredients and mix well with a spatula, taking care to break any lumps in the almond meal or brown sugar. In a separate bowl mix the almond milk, oil and vanilla extract and add to the dry ingredients. Mix to form a smooth batter, taking care not to over mix.

Fill the lined cup cake tin with the cake mixture, placing enough mixture to fill each mould half way. Add one teaspoon of the raspberry compote and then top with the remaining mixture until the cup cake moulds are 3/4 full. Place in the oven and cook for 20 minutes.

Remove from the oven and place on a wire rack to cool. Once cooled you can either dust with cacao powder or icing sugar.

As a special treat, I often ice the cakes with a vegan icing. In the past I would have used vegan margarine, but now I use avocado instead which is so much healthier. However, you need to be careful to only ice the number of cakes you actually need as avocado tends to oxidise, not that you would notice with the cacao powder in it:)

To make the icing, finely mash one avocado (to frost about 4 cupcakes), so that there are no lumps and add the cacao powder and icing sugar and mix well.  Place the mixture in  a piping bag and pipe onto the cupcakes or use a palette knife to spread. Top with a fresh raspberry. Serve and enjoy.


Eggplant fritters (pakoras)


These fritters are the perfect snack for a lazy afternoon, especially if it is raining outside. They are even better served with a cup of hot chai.

You will need:

1 small-medium sized eggplant
1 cup chickpea flour
1/4 teaspoon ajwain  (bishops weed)
1/2 teaspoon of salt
1/4 teaspoon of chilli powder
2 small cloves of garlic grated
1/2 teaspoon of dried kasoorie methi (fenugreek leaves)
A pinch of baking powder
Approximately 3/4 cup of water
Oil to fry

Slice the eggplant into thin slices and season with salt and set aside. Make the batter by placing the chickpea flour in a large mixing bowl. Add the ajwain and  fenugreek leaves if using. They are not necessary but add to the flavour. You can add chopped coriander and green chilli instead if you prefer or keep it plain. Add the powdered spices and baking soda and mix. Gradually add the water to get a thick batter. You will need between 1/2 to 3/4 cup.

The pakoras are traditionally deep fried, but I use a non stick pan and panfry them.  Heat a non stick pan and add enough oil to cover the bottom in a thin layer. I use rice bran oil because of the high smoke point. Once the oil is hot but not smoking, dip the eggplant slices in the batter and place in the fry pan (being careful to place away from you). Do not overcrowd the frying pan. Cook both sides until golden brown and crispy. Serve hot with tamarind chutney.

Sunday, 21 April 2013

Gluten free, vegan, walnut brownies


These brownies are so decadent that you won't even realise that there is no gluten, eggs or dairy in them.

Ingredients

1/2 cup almond meal
1/2 cup chick pea flour
1/2 cup brown sugar, firmly packed in (I prefer less sugar, but you can increase the quantity to 3/4 cup if you prefer)
1/4 pure cacao powder
3 heaped teaspoons of egg replacer powder
1/2 cup (10 whole) of chopped walnuts
1/4 cup oil
1/2 cup almond milk
1 teaspoon baking soda
1/2 teaspoon baking powder
1 teaspoon vanilla extract
1 teaspoon of ground coffee

Method

Preheat a fan forced oven to 175 C. In a large mixing bowl add all the dry ingredients (except the chopped walnuts) and mix well with a spatula, taking care to break up any lumps in the almond meal or brown sugar. Add the chopped walnuts. I prefer to use walnuts in their shells, which I de-shell myself as I think the nuts are fresher this way as the skin does not go rancid and eliminates the step of roasting the nuts. Mix to combine.  In a smaller bowl, mix together the wet ingredients and then add to the dry ingredients to form a thick batter. Take care not to over mix. Pour into a lined baking tray/ brownie tin. I use aluminium foil to line as it is easier to press into the corners and it also allows me to take the brownies out easily while still warm.

Place in the oven and cook for 20 minutes. Turn off the oven and allow to cool in the oven for 10 minutes, and then take them out.  Set aside for 10 more minutes and then cut into squares while the brownies are still warm. Enjoy them warm or cold with a simple dusting of icing sugar. The brownies keep well for 3-4 days, if your friends and family do not polish them off sooner.


Turkey mince chilli con carne


Traditionally chilli con carne is made with minced beef, but since it is a potential allergen I use lamb mince or as with this recipe turkey mince instead as it is a healthier alternative to red meat.

Ingredients (to serve 4-6)
500 gms turkey mine
1 cup/ can of red kidney beans
1 cup/ can of corn kernels
1 can of diced tomatoes or 4 tomatoes chopped
2 green chillies
2 onions
5 cloves of garlic
1 teaspoon each of cumin and coriander powder
1 teaspoon of cacao powder
Salt and chilli powder to taste
1/4 cup of chopped coriander
2 tablespoons of oil

I start with soaking the 1 cup of dry kidney beans and then cooking them until tender. I reserve both the beans and the cooking liquid as it adds a great flavour and colour to the final product.

In a large skillet, add the oil and fry the chopped chilli, garlic and onions until the onions are translucent. Add the turkey mince and mix well, using the back of the spatula to break down any lumps. Once the meat is browned, add the tomatoes followed by the salt. continue to cook on a low heat for about 10 minutes and then add the corn and the kidney beans. Mix well and add the cooking liquid from the kidney beans a little at a time. If using canned kidney beans, just add some water or stock (if available). Add the remaining spices and cacao, mix and simmer for a further 10 -15 minutes, adding more liquid if required. Add the chopped coriander and serve hot with rice or corn tortillas and a side of guacamole. Any left overs can be frozen or can be used as a topping for nachos.

Friday, 19 April 2013

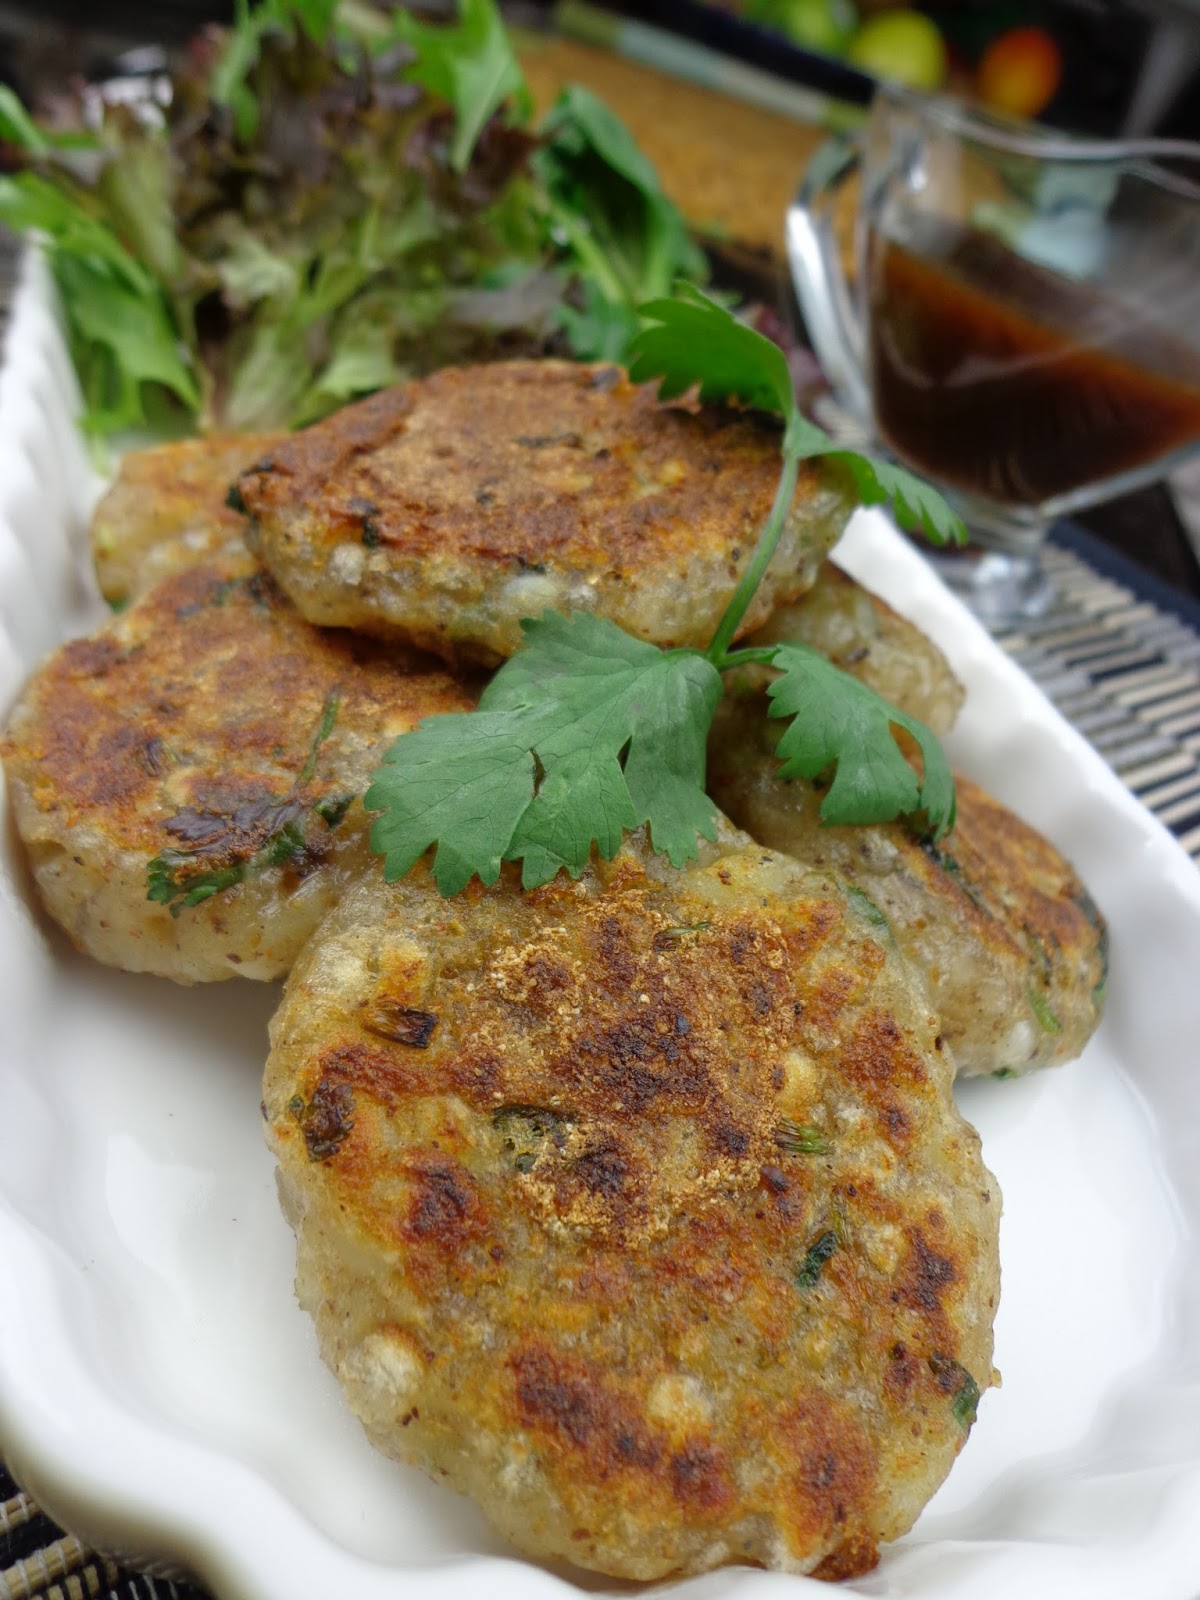
Sago and potato cakes (sabu dana vada)


This is a really simple recipe that can be used as a snack or appetiser or make them small and serve them as canapes.

Essentially, you need to use equal quantities of soaked sago (tapioca) and mashed potatoes and spices and flavourings of your choice.

To make 15-16 medium sized patties, I used the following:

1 cup of sago, soaked for a minimum of 2 hours
6 medium sized potatoes, boiled and mashed
1 teaspoon of grated ginger
1 green chili finely chopped
4-5 tablespoons of chopped coriander
1 teaspoon of cumin powder
Salt and chili powder to taste
Oil to fry

Drain the soaked sago in a colander to get rid of the excess moisture and add to a mixing bowl along with the boiled and mashed potatoes. I mix the two together and keep some aside at this point to make little patties for my baby. To the rest of the mixture I add the remainder of the ingredients. The base is very versatile, so you can add other herbs and spices if you prefer. Chives, spring onions, garlic etc. work very well as well.

Mix well and shape into medium sized patties. You can deep fry them if you prefer, but I just pan fry them in a non stick pan. I use a small quantity of rice bran oil, and cook both sides on a low heat first, pressing down on the patties with a spatula to ensure good even contact. I then increase the heat towards the end which results in a really crisp outside and soft interior. Serve hot with tamarind chutney or mint chutney or even tomato ketchup or barbeque sauce. You can also use them as fillings for wraps.


Wednesday, 17 April 2013

Gluten free flat bread with fenugreek


This flat bread is inspired by the Thepla, which is a flavoured flat bread in Gujarati cuisine. It is traditionally made with bajra (millet flour) and methi (fenugreek leaves) and the dough is brought together with yoghurt and milk. My version is dairy free and to make it you will need the following:

1 cup of millet flour (bajra/bajri)
1/2 cup of chopped methi (fenugreek either fresh or frozen)
1/2 cup of warm water
1 tablespoon of sugar
2 tablespoons of oil
1 clove of garlic finely chopped
2 spring onions finely chopped
1/2 teaspoon of salt
1 green chilli finely chopped

I have used fresh methi from my garden but you can also use frozen methi (you will need to reduce the quantity of water used). Pick the methi leaves and finely chop them along with the spring onion, chilli and garlic.

In a mixing bowl add the millet flour and salt and mix. Add the methi and other chopped ingredients. Mix the sugar in half a cup of warm water and use it to bring together the dough adding the water gradually until you get he right cinsistency. You might think it a bit odd to add sugar to a savoury bread, but it is definitely required (especially as we are not using yoghurt) as both the fenugreek leaves and millet flour have bitter undertones and the sugar helps balance it. Knead the dough briefly and shape into small balls.  Roll out each dough ball into a circular shape on a flat surface with a rolling pin. You can dust the rolling surface with the millet flour to stop the bread from sticking. Cook on a hot tava or fry pan adding a little oil while cooking each side.

Enjoy warm with dal or dry curry or on its own with a pickle or chutney of your choice.

Khoresth lepi (lamb with bengal gram lentils)


This is another staple dish of the Armenian and Iranian cuisine, and since it has dal and is really easy to make, I have adopted as well as adapted it to my taste buds :)

To serve six, you will need the following:

2 cups of bengal gram/ chana dal washed and soaked
500-600 gms of lamb (I used a combination of rump steak and chops)
2 onions chopped
4 cloves of garlic chopped
2 tomatoes chopped
1/2 teaspoon of turmeric
Salt and chilli powder to taste
1 teaspoon of meat masala (prepared spice mix found in Indian and middle eastern stores)
1 bay leaf
4-5 dry limes (whole limes or lemons which have been dried. They are the key ingredient in this dish as they infuse the entire dish with a tangy flavour. They can be found in middle eastern stores or you can dry some yourself as long as you do not live in a humid environment)
2 tablespoons of oil
6-7 cups of water


In a pressure cooker or heavy based saucepan, add the oil and bay leaf followed by the onion and garlic. Cook until the onion is translucent and starting to colour. Add the meat and cook on a high heat to seal the juices. Add the chopped tomatoes followed by the washed, soaked and drained lentils. stir to mix well and add the powdered spices. Add the dry limes, I like to keep some whole and smash the others so that the lime flavour permeates the entire dish while cooking. Add the water and close the pressure cooker and allow it to come to full pressure on high heat. Reduce the heat and cook for a further 3 whistles. Allow the pressure to subside before opening the pressure cooker. If using a saucepan, cook until the dal and meat are tender. If you are using a cut of meat that requires more cooking, give it a head start and only add the lentils when the meat is half done.

I always add some chopped coriander and generally serve this with plain rice.

Allergen free vegan brownies


I have tried to avoid all of the common allergens from these brownies. This recipe has been made with millet meal (which is a gluten free grain flour that has a slightly bitter undertone) but chick pea flour or brown or white rice flour works equally well. I make a small batch for myself as otherwise I end up eating it all - the ingredients below will make 8 medium sized brownie squares which will easily keep for 2-3 days in an air tight container.

You will need the following:

1/2 cup of gluten free flour (millet/ rice/chick pea flour or shop bought gluten free all purpose flour)
1/2 cup of soft brown sugar
1/4 of pure cacao powder
2 heaped teaspoons of egg replacer powder
1/4 rice bran oil
1/4 cup rice milk
1/2 teaspoon of baking powder
1/2 teaspoon of baking soda
1/2 teaspoon of vanilla extract

Method

Mix all the dry ingredients in a bowl (including the egg replacer powder). In another large bowl mix the oil, rice milk and vanilla extract and then gradually add the dry ingredients. Mix well and transfer into a small baking tray/ foil container. I often use a lined loaf tin -  this allows the brownies to rise a bit but they do sink when cool.

Place in a pre heated oven (175C) for 18-20 minutes. Cool in the oven for about 10 minutes and cut into squares while still warm. Dust with icing sugar or cacao powder and enjoy with a cup of coffee or as a desert with berries and vegan custard or chocolate sauce.


Saturday, 13 April 2013

Asian inspired vegetable and rice noodle soup


This is another one of the recipes in my repertoire that I cook when I want something quick and easy.

Ingredients (to serve 4)

1litre of vegetable or chicken stock
2 packets of rice noodles (400-450 gms)  (I have used the fresh variety which I rinsed in water to separate before adding to the soup)
1 can of sweet corn kernels drained
4 cloves of garlic finely chopped
1 inch piece of ginger finely chopped
1 red chilli finely chopped (optional)
3 carrots diced
1/2 cup of chopped beans
1/2 cup of peas
Handful of coriander springs
1 lime
Salt and pepper to taste
1 tablespoon of oil

Method

In a large saucepan, heat up the oil and add the ginger, garlic and chilli (if using). cook for about 1 minute and add the fresh vegetables. In my case only the carrots were fresh and the beans and peas were frozen so I reserved them for later. Cook the carrots for 2-3 minutes and then add the stock. Continue to cook the carrots in the stock, once it comes to the boil, simmer and add the corn kernels followed by the frozen vegetables and rice noodles. Season with salt and pepper and allow the soup to come to a boil again. Simmer further for 2-3 minutes and add the chopped coriander and lemon juice. Serve hot and garnish with coriander and slices of fresh lime.


Quick and easy minestrone soup


As soon as there is a nip in the air, I start making soups for our evening meal at least 1-2 times per week. This version of the minestrone soup is one of my favourites as it is really quick and simple to prepare and is also healthy and delicious.

To serve 4, you will need the following:

1 litre of stock (I have used a good quality shop bought vegetable stock with no preservatives or additives, but you can make your own or use chicken stock if you prefer)
1 bottle (720 ml) of passata (Italian tomato puree, which is a bit runny, you can choose to use can tomatoes, or fresh, but will need to increase the cooking time)
1 cup of rice pasta
1 can of beans/ chick peas
assortment of vegetable ( about 2 cups)
3 cloves of garlic
Small bunch of basil and chives
Salt and pepper to taste
1 tablespoon of olive oil

Method

This is more of an assembly job than cooking, and that is why it is so quick to make. I start with 1 tablespoon of oilve oil in a large saucepan, to which I add the finely chopped or minced garlic cloves. Fry for 30 seconds and add the vegetables (I used 2 carrots, 1 green and 1 yellow capsicum). Fry the vegetables in the oil for 2 minutes and then add the stock and passata. Bring the mixture to the boil and add the pasta. Once the pasta is nearly done, add the can of drained and rinsed beans of your choice. I used chick peas. Simmer, until the pasta is cooked. Season with salt and pepper and add the fresh herbs.

Ladle into large bowls, sprinkle over some more herbs and drizzle with olive oil and enjoy a hearty meal.

Monday, 8 April 2013

Chana ki dal


Dal chawal (lentils and rice) are the corner stone of Indian cuisine, and for me they are not only comfort food but a life saver as in my house they do double duty as both baby and adult food.

Ingredients (serves 4-5)
(For the dal)
2 cups of channa dal (washed and soaked for at least 30 minutes)
1onion
4 large cloves of garlic
1 inch pice of ginger
8 cups of water
1/2 teaspoon of salt
1/2 teaspoon of turmeric

(For the tarka)
1 onion
1 teaspoon of garam masala powder
Salt and chilli powder to taste
2 tablespoons of oil

Chopped corriander for garnish

Method

In a large saucepan or pressure cooker (if you have one) add the channa dal, along with the chopped onion, ginger, garlic, salt and turmeric powder with the water. Cook on a high heat, until the pressure cooker reaches full pressure of the contents of the saucepan come to a boil. reduce the heat and continue cooking for a further 3 whistles or until the dal is cooked through.

At this point, I set aside some dal for my little one, and blend it with some plain rice for a nutritious protein packed meal. 


For the adult version, I prepare the tarka by heating some oil in a fry pan and adding a chopped onion. Fry the onion on high heat, stirring occasionally to stop it from burning. The idea is to fry and brown the onion. Once the onion is golden brown, add the salt, chilli powder and garam masala. Turn off the heat and add the tarka to the cooked lentils. Add chopped coriander and serve hot with rice or flat bread and a simple salad of chopped onion, cucumber and tomato seasoned with salt and lime juice.